How to Make 6 Different Snowflakes with 2 year-olds
The winter is in full swing and we’ve been enchanted by the charm of snowflakes. That’s why we decided to create a few of them, and since no two snowflakes are exactly the same, the snowflakes we created are not the same either. To make it even more unique, we created each snowflake with a different technique which 2-year-olds can handle. For all these creative activities we will need hard paper.
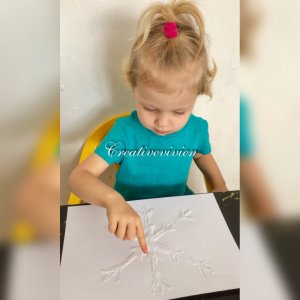
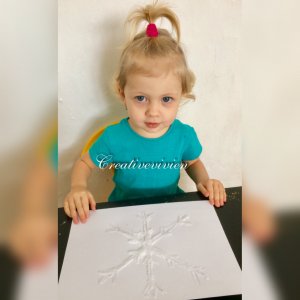
Snowflake made from salt
Material: hard paper, pencil, glue, glue bowl, paint brush, paint bowls, paints, water, paint brush, salt, salt bowl
Instructions: This activity is great for kids and moms. Not only children but mothers will be entertained. First, draw a snowflake with a pencil on the hard paper. Next, Vivien cover this snowflake with glue, the more the better. Now comes the salt. Vivien sprinkled the salt over the whole flake. I poured the rest that did not stick to the flake back into the salt bowl. Then we let it dry a bit, for about 2-3 minutes.
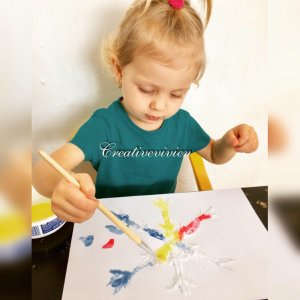
I prepared the bowls with water and paint, about 100ml with 1 centimeter of paint, and stirred it well. We used 3 colors: blue, red and yellow. You can also use other water-soluble paints, such as powder paints or watercolors.
Then we began to paint. Just place the brush next to the salt flake and watch the color spread out. Excitement is guaranteed!
We created 3 such flakes. I certainly recommend this method.
Dotted snowflake
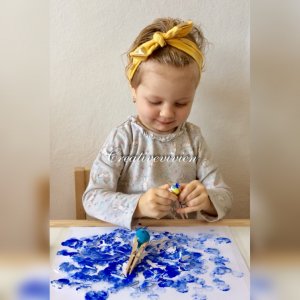
Material: hard paper, acrylic paint, pearls, pom poms – 2 different sizes, paint bowl, cut out paper snowflake, adhesive tape, scissors
Instructions: Clamp the pom poms with clothes pegs. Prepare the colors we will use in the bowls. I prepared blue and white acrylic paint. The choice is of course yours. Stick a snowflake on the hard paper with adhesive tape. It shouldn’t be pressed too hard as we will carefully remove it in the end.
And let’s get down to creating!
After applying the paint and some drying, carefully remove the snowflake. And we have another art work.

Cubist snowflake
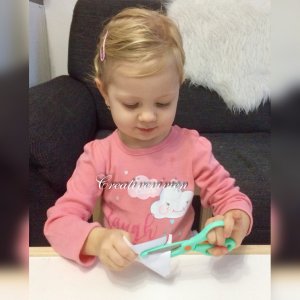
Material: hard paper, glue, light blue and dark blue colored paper, paper snowflake, scissors
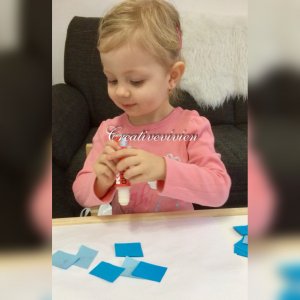
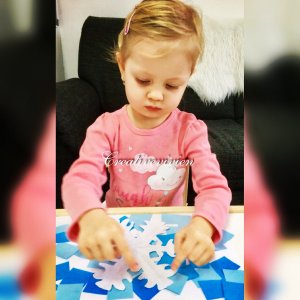
Instructions: With this creation, Vivien probably did not even breathe, so thrilled was she about what was going on on paper. She fully focused on gluing differently cut colored paper, which, of course, she had cut, too. When we had all the papers glued, it was time for the snowflake. Our little cubist art work, voila.
Abstract snowflake
Material: hard paper, paint bowl, acrylic paint, paint brush
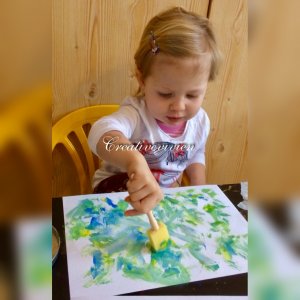
Instructions: We used a flat brush for painting this snowflake abstraction. Vivien used different colors and created various shapes on the hard paper. Finally, we tried to paint a snowflake together. What’s more, by mixing the colors, new shades are created.
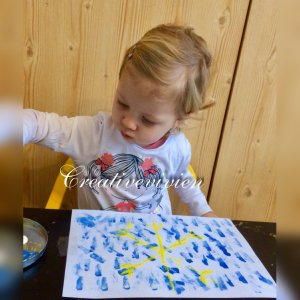
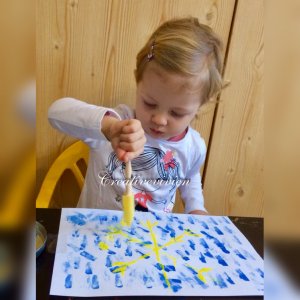
Snowflake created out of lines
Material: hard paper, acrylic paint, flat brush, paint bowl, pencil
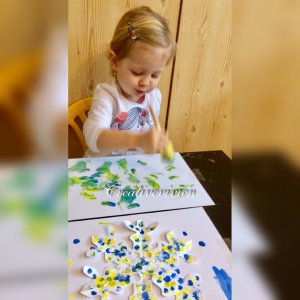
Instructions: Draw a snowflake on the hard paper with a pencil. Use a flat brush to paint lines on it. Try to paint the snowflake with a different color. We chose yellow as Vivien painted the rest of the painting in blue and white.
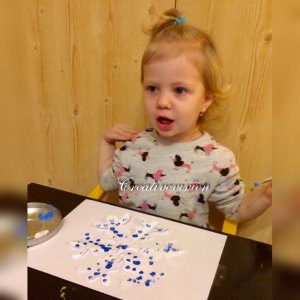
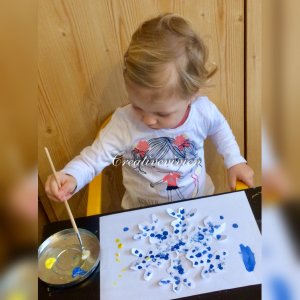
Snowflake as a mosaic
Material: hard paper, acrylic paint, brush, paint bowl, snowflake cut out of paper, adhesive tape, scissors
Instructions: Stick the snowflake to the drawing using the adhesive tape. This time I decided to decorate only the snowflake itself. Of course, a few dots have gone to the remaining paper. This way we attempted to create a mosaic on the flake.

With these different techniques of painting, we also learn different colors and explain what we are painting. We can talk about winter and snowflakes, and sing songs about these themes.
*********************************************************************************************************************
Ako si vyrobiť 6 rôznych snehových vločiek s 2 ročnými deťmi
Zima je v plnom prúde a nám učarovalo čaro snehových vločiek. Preto sme sa rozhodli, že si ich zopár vytvoríme a keďže žiadna snehová vločka nie je úplne rovnaká, tak ani naše vytvorené vločky nie sú také isté. Aby sme si tvorenie troška spestrili, tak sme vytvárali vločky rôznymi technikami. Tieto techniky zvládnu 2 ročné detičky. Na všetky tieto tvorivé aktivity budeme potrebovať výkres, na ktorý budeme tvoriť.
Snehová vločka vyrobená zo soli
Materiál: výkres, ceruzku, lepidlo, nádobka na lepidlo, štetec, nádobky na farby, farby, voda, štetce na farby, soľ, nádoba na soľ
Postup: Táto aktivita je super pre detičky a mamičky. Zabavia sa pri nej nielen deti, ale aj mamky. Najskôr si na výkres nakreslíme ceruzkou snehovú vločku. Túto nakreslenú vločku Vivien následne natrela lepidlom, kľudne môže byť použité aj viac lepidla, nahrubo. Teraz príde na rad soľ. Vivien po celej vločke poriadne posypala soľou. Zvyšok, ktorý sa neprilepil na vločku, som vysypala naspäť do mištičky, v ktorej bola soľ. Troška sme to nechali zaschnúť, asi 2-3 minútky.
Do nádobiek na farby som rozrobila farbu s vodou, na 1 dc farby cca 1 cm vytlačenej farby, toto množstvo treba poriadne rozmiešať vo vode, nech sa nám pekne zafarbí. My sme použili 3 farby, modrú, červenú a žltú. Môžete použiť aj iné farby vo vode riediteľné, napríklad práškové, vodové.
Potom sme s takto rozrobenými farbami začali maľovať. Štetec len priložíme na soľnú vločku a sledujeme ako sa farba rozpíja po soľnej snehovej vločke. Zábava je zaručená.
My sme vytvorili 3 takéto vločky. Určite Vám toto kreatívne tvorenie odporúčam vyskúšať.

Bodkovaná snehová vločka
Materiál: výkres, akrylové farby, štipce, pom pom guličky – 2 rôzne veľkosti, miska na farby, vystrihnutá snehová vločka z papiera, lepiaca páska, nožničky
Postup: Do štipcov prichytíme pom pom guličky. Do misiek si pripravíme farby, ktoré budeme používať. Ja som pripravila modrú a bielu akrylovú farbu. Výber je samozrejme na Vás. Na výkres si prilepíme pomocou lepiacej pásky vystrihnutú snehovú vločku z papiera. Vločku netreba silno pritlačiť o výkres, na konci ju budeme opatrne odstraňovať.
A hurá do tvorenia!
Po nanesení farieb na výkres a čiastočnom vyschnutí farieb, snehovú vločku opatrne odstránime z výkresu. A ďalšie krásne dielo máme na svete.

Kubistická snehová vločka
Materiál: výkres, lepidlo, svetlomodrý a tmavomodrý farebný papier, papierová snehová vločka, nožnice
Postup: Pri tomto tvorení Vivien asi ani nedýchala, tak bola nadšená, čo nám to vzniká na papieri. Plne sa sústredila najskôr na lepenie rôzne nastrihaného farebného papiera, ktorý samozrejme aj ona strihala. Keď sme mali celý papier polepený prišla na rad snehová vločka. Naše malé kubistické dielo je na svete.


Abstraktná snehová vločka
Materiál: výkres, miska na farby, akrylové farby, štetec
Postup: Pri tomto maľovaní abstrakcie snehovej vločky sme použili plochý štetec. Farby Vivien rôzne nanášala a na výkrese vytvárala všelijaké obrazce. Nakoniec sme sa spoločne pokúsili namaľovať snehovú vločku. Miešaním farieb na výkrese nám vznikajú aj nové odtiene farieb.

Snehová vločka vytvorená z čiarok
Materiál: výkres, akrylové farby, plochý štetec, miska na farby, ceruzka
Postup: Na výkres si ceruzkou nakreslíme snehovú vločku. Pomocou plochého štetca nanášame na výkres farby. Snažíme sa snehovú vločku maľovať inou farbou. My sme zvolili žltú, kedže Vivien celý svoj obraz maľovala modrou a bielou farbou.


Snehová vločka ako mozaika
Materiál: výkres, akrylové farby, štetec, miska na farby, snehová vločka vystrihnutá z papiera, lepiaca páska, nožnice
Postup: Snehovú vločku sme pomocou lepiacej pásky nalepili na výkres. Tento krát som sa rozhodla, že vyzdobíme len samotnú vločku. Samozrejme zopár čiarkam a bodkám sa ušlo aj zvyšnému výkresu. Pokúsili sme sa vytvoriť na vločke mozaiku.


Myslím, že môže byť.
Čo poviete?