Painted candlestick
Beautiful atmosphere of long winter evenings can be enhanced by charming candlelight. A DIY painted candlestick is even more glamorous when your child makes it for you. This time we help ourselves with paint on the glass.
Material:
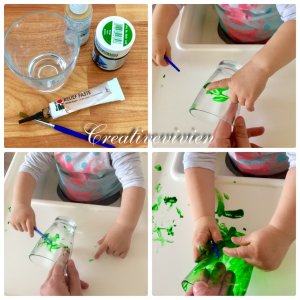
glass cup, glass paint, paint brush, contour colors, bowl
Instructions:
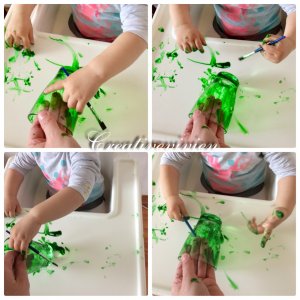
As we use a glass cup in this activity, we pay particular attention to younger children not getting hurt. In that case we help to handle the glass. I was holding the cup for Creative Vivien due to her age. I gave her the paint in the bowl and a paint brush. I showed her what we’re going to paint. She proceeded smoothly according to my instructions, except that she kept the brush in one hand and dipped her finger in the paint and painted with it instead. But after a while, the brush got to work as well.
Covering the entire area of the candlestick takes some time. It is good to pick glass paint which dries quickly, because the child returns to the painted area again. Allow the cup to dry well enough. Then we can paint the stars, the tree, the comet with a finely contoured paint. This time we together painted a star and a comet on the candlestick.
This activity is quite challenging, as for the material, as well as the activity itself is time consuming.
However, the child is having fun, and when the weather is not good, it is a great way to enjoy time indoors.
Maľovaný svietnik
Príjemnú atmosféru dlhých zimných večerov vám spraví krásny maľovaný svietnik. Maľovaný svietnik je tým čarovnejší, že vám ho vyrobí vlastné dieťa. Tentokrát sme si zobrali na pomoc farby na sklo.

Materiál:
sklenený pohár, farba na sklo, štetec, kontúrovacie farby, mištičku
Postup:
Keďže pri tejto aktivite použijeme sklenený pohár, tak hlavne pri menších deťoch dávame pozor, aby si neublížili. Malým deťom pomáhame s manipuláciou pohára a pridržiavaním. Kreatívnej Vivien som, vzhľadom na vek, pohár pridržiavala. Dala som jej mištičku s farbou a štetec do ruky. Ukázala som jej, čo ideme maľovať. Pekne postupovala podľa mojich inštrukcií, až na to, že štetec držala v jednej ruke a do farby si namáčala prst a maľovala ním. Ale po chvíľke zapojila do činnosti aj štetec.
Vymaľovanie celej plochy svietnika zaberie viac času. Dobré je vybrať takú farbu na sklo, ktorá rýchlo zaschne, pretože dieťa sa opätovne vracia k maľbe namaľovanej plochy. Pohár necháme dostatočne zaschnúť. Kontúrovacou farbou môžeme potom jemne domaľovať hviezdičky, stromček či kométu. My sme na svietnik spoločne dorobili hviezdičky a kométu.

Táto aktivita je pomerne náročná na materiál a aj samotná aktivita je zdĺhavá. Avšak dieťa sa pri nej zabaví aj napriek nepriaznivému počasiu vonku.
Skvelá aktivita na tvorenie vo vnútri.
