Christmas tree – tips how to create with kids DIY
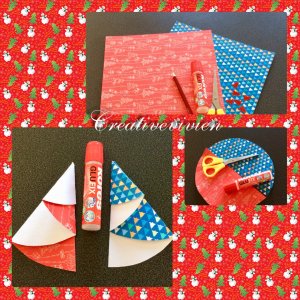
Paper Christmas trees
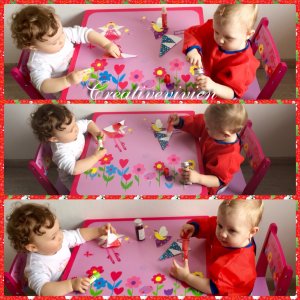
Two nearly one-year-old children for one mother were creating paper Christmas trees.
Paper art is one of the most popular children’s activities.
This activity is a bit more challenging to prepare, but it is very fun and creative.
This time Creative Vivien did not create on her own, but she called upon her great friend Natálka.
The kids were very skillful, only needed to show them how to do it. Then they did a great job.
These beautiful paper Christmas trees are already decorating our homes.
Material:

colored paper
glue
pencil
scissors
adhesive trees
sponge for applying glue
Directions:

- First, cut a crescent out of the colored paper with the help of a template. Consequently, bend the edges along the dotted line. Don’t cut, just bend.
- When we firmly bend the edges, put glue on them to keep the tree together.
3. Leave to dry.
4. Finally, decorate the tree with prepared ornaments. We chose decorative trees.
5. You can also use the tree as a decoration when you make a hole on the top of it, through which you can put in a lace.
The creation of paper Christmas trees is a great activity even for older children, where we can leave it completely up to them.
Polystyrene tree

We’ll stay for a while in the Christmas theme. We are bringing you one more tip for creating with the smallest kids.
Material:
green acrylic paint
paint bowl
golden shiny acrylic paint and white matt acrylic paint
sponge
polystyrene tree
Directions:
1. Put the green paint into the bowl with which your child will decorate the whole tree as they likes.
2. Allow the paint to dry sufficiently.
3. Finally decorate it with the golden paint. We will create dots that will resemble Christmas baubles.
4. Create a star on the top, the golden color will make the star’s edges and fill the center with white.
Making of paper Christmas trees is a great activity even for older children, where we leave the process only to them.
Vianočné stromčeky
Papierové vianočné stromčeky
Papierové vianočné stromčeky, alebo dve, skoro ročné deti na jednu mamu.
Tvorenie z papiera patrí medzi veľmi obľúbené detské aktivity. Táto aktivita je síce troška náročnejšia na prípravu, ale patrí medzi veľmi zábavné a tvorivé.
Tentokrát kreatívna Vivien netvorila sama, ale si zavolala na zábavu skvelú kamošku Natálku.
Detičky boli veľmi šikovné, len im bolo treba ukázať, ako na to. Potom im to išlo od ruky.
Tieto krásne papierové vianočné stromčeky už zdobia naše príbytky.

Materiál:
farebný papier
lepidlo
ceruzka
nožnice
nalepovacie stromčeky
špongie na nanášanie lepidla
Postup:
- Najskôr si vystrihneme z farebného papiera pol oblúk. Podľa priloženej šablóny. Následne si rohy pozahíname podľa prerušovanej čiary. Neprestrihujeme, len pozahíňame.
- Keď poriadne popritláčame kraje, tak na kraje pridáme lepidlo, aby nám stromček lepšie držal spolu.
- Necháme zaschnúť.
- Na záver si stromček ozdobíme pripravenými ozdobami. My sme si zvolili dekoračné stromčeky.
- Stromček môžete použiť aj ako dekoráciu, keď si na vrchu spravíte dierku, cez ktorú prevlečiete šnúrku.
Polystyrénový stromček
Vo vianočnej tematike ešte chvíľu ostaneme. Prinášame Vám ešte jeden tip na tvorenie s najmenšími detičkami.
Materiál:
zelená akrylová farba
mištička na farbu
zlatá lesklá akrylová farba a biela matná akrylová farba
špongia na nanášanie farby
polystyrénový stromček

Postup:
- Do nádobky na farbu pridáme zelenú farbu, s ktorou Vaša ratolesť vyfarbí celý stromček, tak ako sa jej páči.
- Farbu necháme dostatočne uschnúť.
- Na záver ozdobíme so zlatou farbou. Vytvoríme bodky, ktoré budú pripomínať vianočné gule.
- Na vrchu vytvoríme hviezdičku, zlatou farbou spravíme okraj hviezdičky, stred vyplníme bielou farbou.

