Ideas for creative activities
In this article, Ideas for creative activities, we bring you 5 amazing creative ideas you can use throughout the year. Be sure to enjoy and enhance the creativity of your kids.
These ideas have already been published on our facebook profile: Creativevivien and Instagram profile: creativevivien. In the article, however, we provide you with instructions and the necessary material to create with your darlings.
Activities are very simple and adjusted to the age of your child.
Plate ladybird
Material: hard paper, paper plate, black acrylic paint, red acrylic paint, glue, paint brush, bowl, white paper, scissors
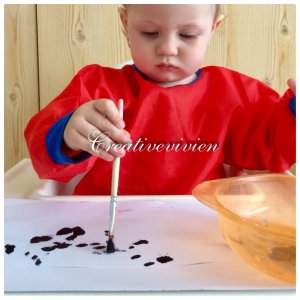
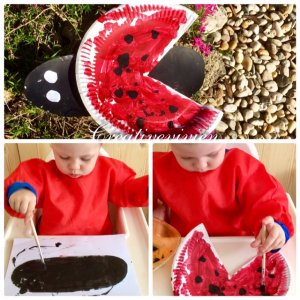
Directions: Cut an elongated shape out of the hard paper, the body of the ladybird. Then paint the body black and let it dry. In the meantime cut out a small piece of triangle of the paper plate and use it as the wings. Paint these red and also let it dry. Next paint the dots on the wings with black paint. Put the eyes on the body, cut those out of white paper. We also stick the wings. Allow to dry thoroughly. And we have a beautiful ladybird.
Sock puppet – Butterfly
Material: fleece – yellow and red, moving eyes, colored fleece balls, small pom pom balls, glue, scissors, needle, thread
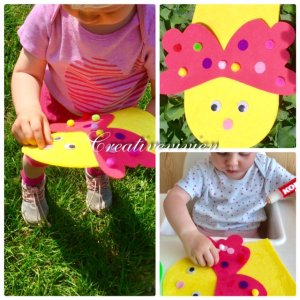
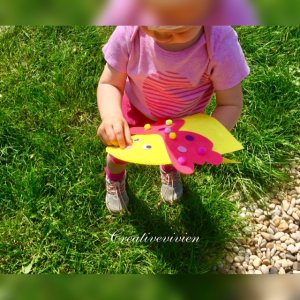
Directions: Cut out a glove in the size of the baby’s hand of the yellow fleece. On the edges, we stitch it so that the hand is not too loose. Out of the red fleece we cut out the wings that we’ll stick to the yellow fleece. Leave the decoration for the creativity of the baby. Stick the eyes, or even the nose or mouth. On the wings and body we stick the fleece balls and the small pom poms. Let it dry well and a beautiful sock puppet is complete.
The following three activities are based on painting.
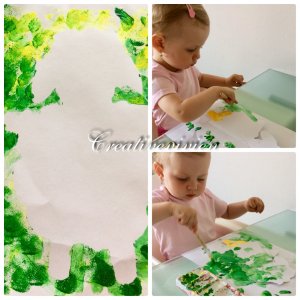
Painted sheep
Material: hard paper, green and yellow acrylic paint, template outline of the lamb, paint brush, bowls, adhesive tape, scissors
Directions: Fix a sheet of hard paper onto a desk so that it doesn’t move around. On a clean hard paper we paste the previously prepared outline of the sheep. We used green and yellow colors for painting but feel free to choose the colors that you like. Once the colors have dried, the template of the sheep is removed.

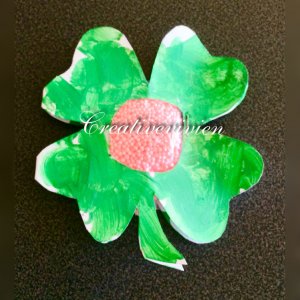
Unusual flower
Material: hard paper, green and golden acrylic paint, pink polystyrene balls, small bag, wooden stick, glue, paint brush, bowl, scissors
Directions: Out of hard paper, cut either a four-leaf clover or flower, but it must be doubled and have to be connected on one side and on the inside we cut out a circle. Creative Vivien first painted a four-leaf clover and then a flower. We put small pink polystyrene beads in small bags and sealed the bags properly. After the four-leaf clover and the flower have dried, we put these bags inside, exactly into the cut circle. The bags do not need to be very full, just insert a few polystyrene balls. Finally, connect the two halves with glue so that the bag doesn’t fall off.

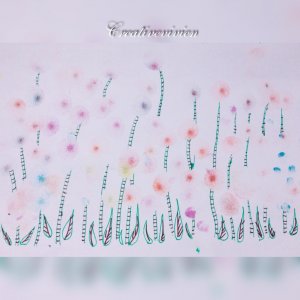
Painted picture for mom
Material: hard paper, fingerprint paints, flat paint brush, green and brown marker
Directions: On Mothers day, we were painting a floral picture with creative Vivien. For her ‘tap tap’ is a TOP technique – that’s how she calls painting. I let her choose between fingerprint paint and a flat brush which she could dip in paints. She used both techniques and was very happy and pleased with the result. In the end we drew stalks and leaves on the flowers with markers.

We believe you read the article till the end.
We’ll be glad if you write to us at creativevivien@creativevivien.com about your views on our articles and activities with kids. We’ll make sure to read them with creative Vivien very carefully.
Thank you for your affection and we wish you a nice creative day.

Nápady na tvorivé aktivity
V tomto článku, nápady na tvorivé aktivity, Vám prinášame 5 úžasných nápadov na tvorenie počas celého roka. Určite sa so svojimi detičkami pri tom zabavíte a rozšírite ich kreativitu.
Tieto nápady sme už zverejnili na našom facebookovom profile: Creativevivien a Instagramovom profile: creativevivien. V článku Vám ale prikladáme návod a potrebný materiál na tvorenie s vašimi štastíčkami.
Aktivity sú veľmi jednoduché a prispôsobené veku dieťaťa.
Tanierová lienka
Materiál: výkres, papierový tanier, čierna akrylová farba, červená akrylová farba, lepidlo, štetec, mištička, biely papier, nožničky
Postup: Z výkresu si vystrihneme podlhovastý tvar, telo lienky. Telo si následne vymaľujete čiernou farbou. Necháme dostatočne uschnúť. Zatiaľ si z papierového taniera vystrihneme malý kúsok trojuholníka. Zvyšnú časť taniera použijeme ako krídla lienky. Tie vymaľujeme červenou farbou. Takisto necháme dostatočne uschnúť. Potom na krídla lienky domaľujeme čiernou farbou bodky. Na telo lienky nalepíme oči, vystrihnuté z bieleho papiera. Nalepíme aj krídla. Necháme celé dostatočne vysušiť. A máme krásnu lienku.
Maňuška – Motýľ
Materiál: flís – žltý a červený, pohyblivé oči, farebné flísové guličky, malé pom pom guličky, lepidlo, nožničky, ihla, niť
Postup: Zo žltého flísu si vystrihneme rukavicu vo veľkosti ruky dieťaťa. Po okrajoch si to zošijeme, aby nám nevypadávala z rukavice ručička. Z červeného flísu si vystrihneme krídla, ktoré sa nalepia na žltý flís. Samotnú výzdobu nechávame na tvorivosti dieťatka. Nalepíme oči, môžete aj nos, poprípade ústa. Na krídla a telo si nalepíme flísové guličky a malé pom pom guličky. Necháme poriadne uschnúť a nádherná maňuška je na svete.
Posledné tri aktivity sú zamerané na maľovanie.
Maľovaná ovečka
Materiál: výkres, zelená a žltá akrylová farba, vystrihnutý obrys ovečky, štetec, mištičky na farby, lepiaca páska, nožničky
Postup: Výkres si nalepíme pomocou lepiacej pásky na stôl, aby sa nám pri činnosti papier nehýbal. Na čistý výkres si nalepíme už dopredu pripravený vystrihnutý obrys ovečky. My sme na vymaľovanie použili zelenú a žltú akrylovú farbu, ale bez problémov si zvoľte farby aké sa Vám páčia, alebo Vášmu dieťatku. Po zaschnutí farieb sa opatrne vystrihnutý obrys ovečky odstráni z výkresu.
Netradičný kvet
Materiál: výkres, zelená a zlatá akrylová farba, ružové polystyrénové guličky, malý sáčok, drevená palička, lepidlo, štetec, mištička, nožničky
Postup: Z výkresu si vystrihneme buď štvorlístok, alebo kvet, ale dvojitý. Nezabúdajte, že musí byť na jednej strane spolu spojený. Do vnútra štvorlístku, alebo kvetu si vystrihneme krúžok. Kreatívna Vivien najskôr vymaľovala štvorlístok a potom kvet. Do malých sáčkov sme naukladali malé ružové polystyrénové guličky a sáčok poriadne uzavreli. Po zaschnutí štvorlístka a kvietku sme tieto sáčky vložili dovnútra, presne do vystrihnutého krúžka. Sáčok netreba veľmi naplniť, stačí vložiť len troška polystýrenových guličiek. Na záver si obidve polky spojíme lepidlom, aby nám sáčok nevypadol.
Maľovaný obraz pre maminku
Materiál: výkres, farebné prstové farby, štetec s plochou štetinou, zelená a hnedá fixka
Postup: Ku dňu matiek sme s kreatívnou Vivien maľovali kvetinkový obraz. U nás je „ďob, ďob“ technika top! Tak volá kreatívna Vivien maľovanie. Na výber som jej dala prstové farby a štetec s plochou štetinou, ktorý si mohla namáčať do farieb. Využila obidve techniky a bola veľmi spokojná a potešená z výsledku. Na záver sme fixkami domaľovali stonky a lístky na kvietkoch.
Spätné upozornenie:Sock octopus/Ponožková chobotnica - creativevivien